I wanted to share some of the things I made with you today. First up, my Rudolph spares. I got the idea from Kerry, she always has such awesome projects. I found these little tins at Michaels for $1 each and filled them with Red Hot candies. I like these tins better than the ones Kerry uses because they hold more candy. I added some reindeer patterned paper from the DCWV 'Tis the Season stack (which I am in love with by the way!). I typed out
Rudolph Spares" on the ol' comp and used Scallop punch to jazz them up a bit. Added some ribbon and a little bell and Voila! Rudolph Spares!


Next up, Snowman soup, which everyone is familiar with. Just printed out the poem on the computer and stamped the Snowman from the Tiny Treats: Christmas stamp set. It was the only Snowman I had that fit on the topper, lol. I like how simple it is though, I love Snowman Soup, such a great gift for a friend, teacher, or coworker!


Here are the Hershey Nugget Tins that I made. The Tis the Season Paper Stack has sooooo many coordinating papers, so I used 2 different patterns for each tin. They all matched so great, I love how they came out! Of course the tins hold 12 Hershey Nugget chocolates. I used mini glue dots to hold them together because for some reason the paper was not staying on with just tape runner. I cut paper into 1" by 3" strips and wrapped them around the chocolate. I used the Tiny treats stamp set again and added ribbons and bells. I am so glad I finished these, it took forever!


The last project I want to share with you today is these stamped tea light candles! I got this idea from this blog here. How cool did these turn out?! Since I had 24 tins and used 18 of them for the Hershey Nuggets, I wanted something to put into the last 6. I wish I had more tins, because I love how these came out, I think everyone should absolutely try this!!! So I wanted to let you know how I did it!
First, you need stamps small enough to fit nicely onto the tea light candle. Once again, the images from the Tiny Treats: Christmas stamp set were perfect! Each nugget tin holds 7 candles. I stamped 7 different images 6 times onto tissue paper. (I originally only had 6 candles in the tins, but my LP said I could fit 7!)
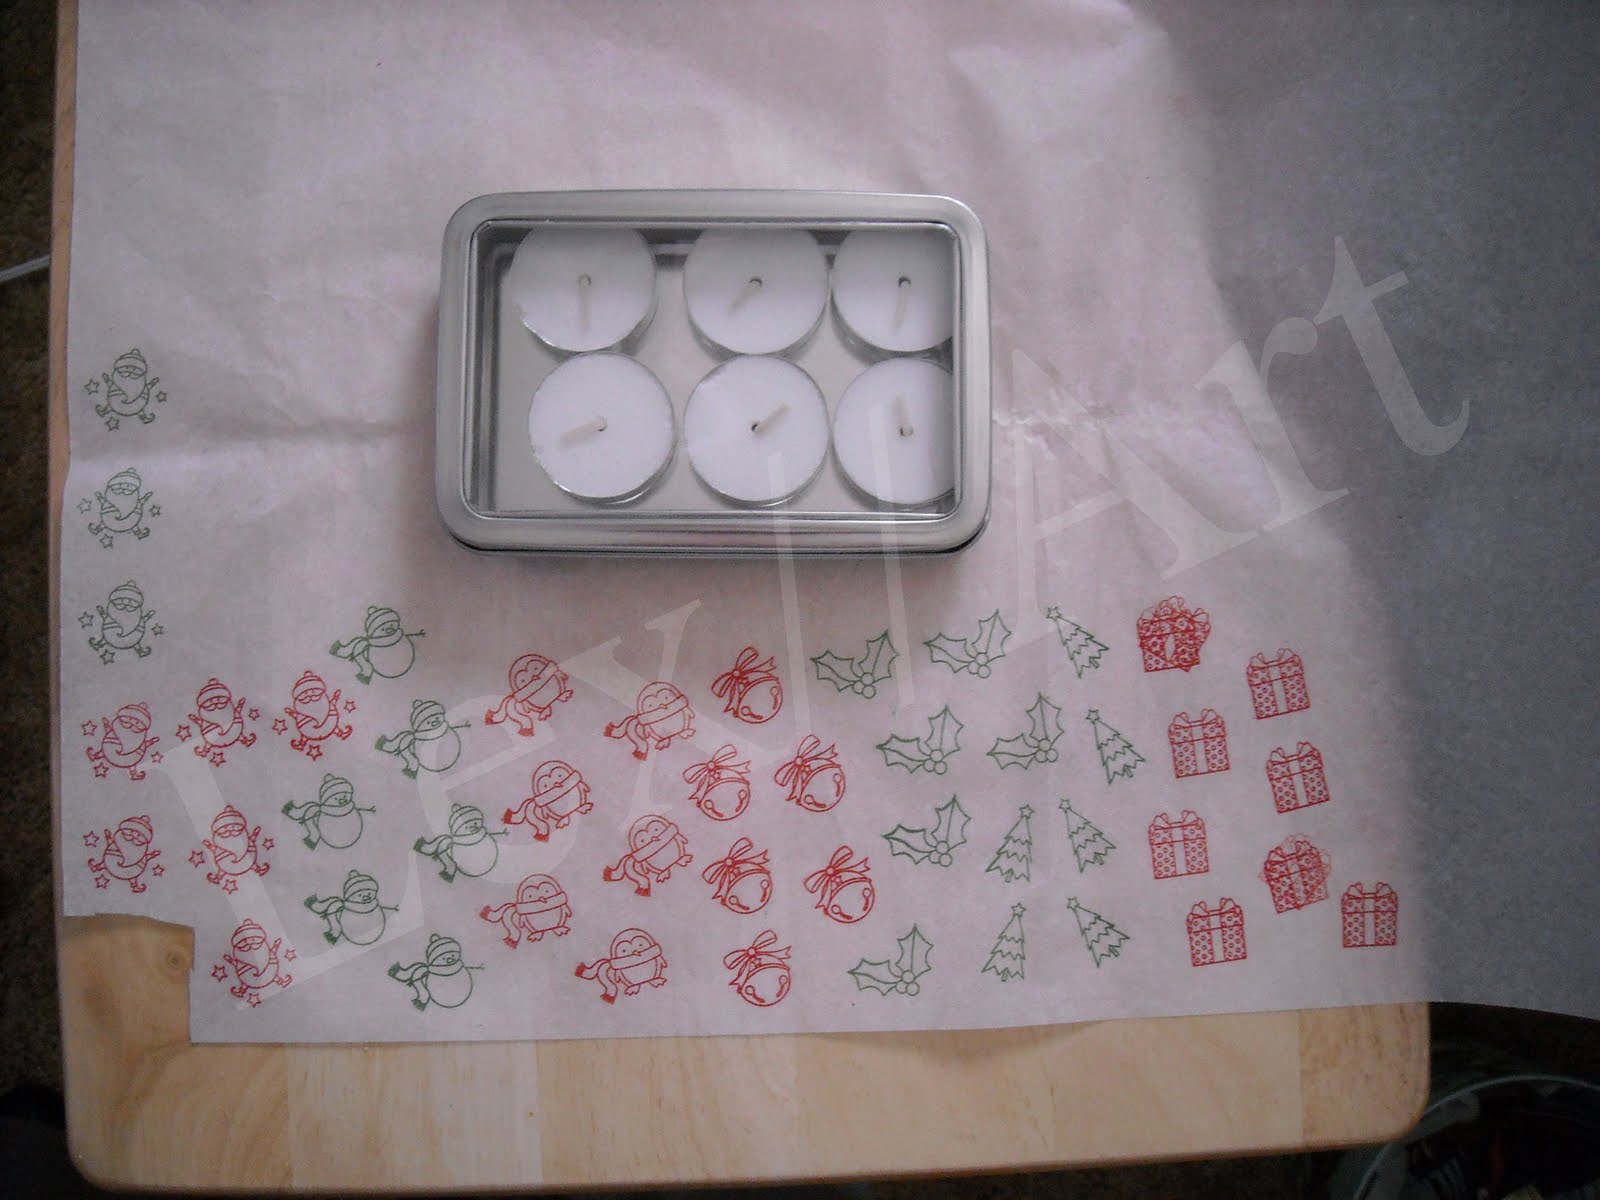
Next, cut out the images and punch a hole through the center. (I used stamps that I could punch a hole in and not mess up the image). You can use a paper piercer or any other tool to punch out the hole. I did this originally, but when I test-burned the candle, some of the image blackened. So I used my Crop-A-Dile to punch a hole that would fit perfectly over the wick without touching it, that way when it burns, it won't burn the paper (don't worry, the tissue paper won't catch on fire). Then place one image over each wick.


Next, use your heat tool and melt the image onto the candle. You have to try it! It just melts into the candle leaving behind just the image and it looks awesome! I imagine you can try this with so many different techniques! Since I was making 6 different sets, I had to set up sort of an assembly line, which helped because I had them all done in less than an hour!


I added some tinsel ribbon around the edges, closed off the tin with some more organza ribbon and added a tag. How cute are these?!? I almost want to nix some of my Hershey tins so I can make more, lol.

I still need to finish sewing off my Christmas Twizzler/Pixie Stix pouches and ornament gift card holders, make some Snowman Soup buckets and Smore Kits, cover up some composition books for Holiday Planners, finish some post-it note holders, and add a little more jewelry to my stash. Whew, I will be busy busy busy and only a few days left to finish! I am so glad I took tomorrow off of work! Thanks for stopping by, check back soon for more finished projects!
No comments:
Post a Comment